How to Activate eSIM on iPhone and Android
https://www.zimconnections.com/how-to-activate-esim-on-iphone-and-android/
 SHARE
SHARE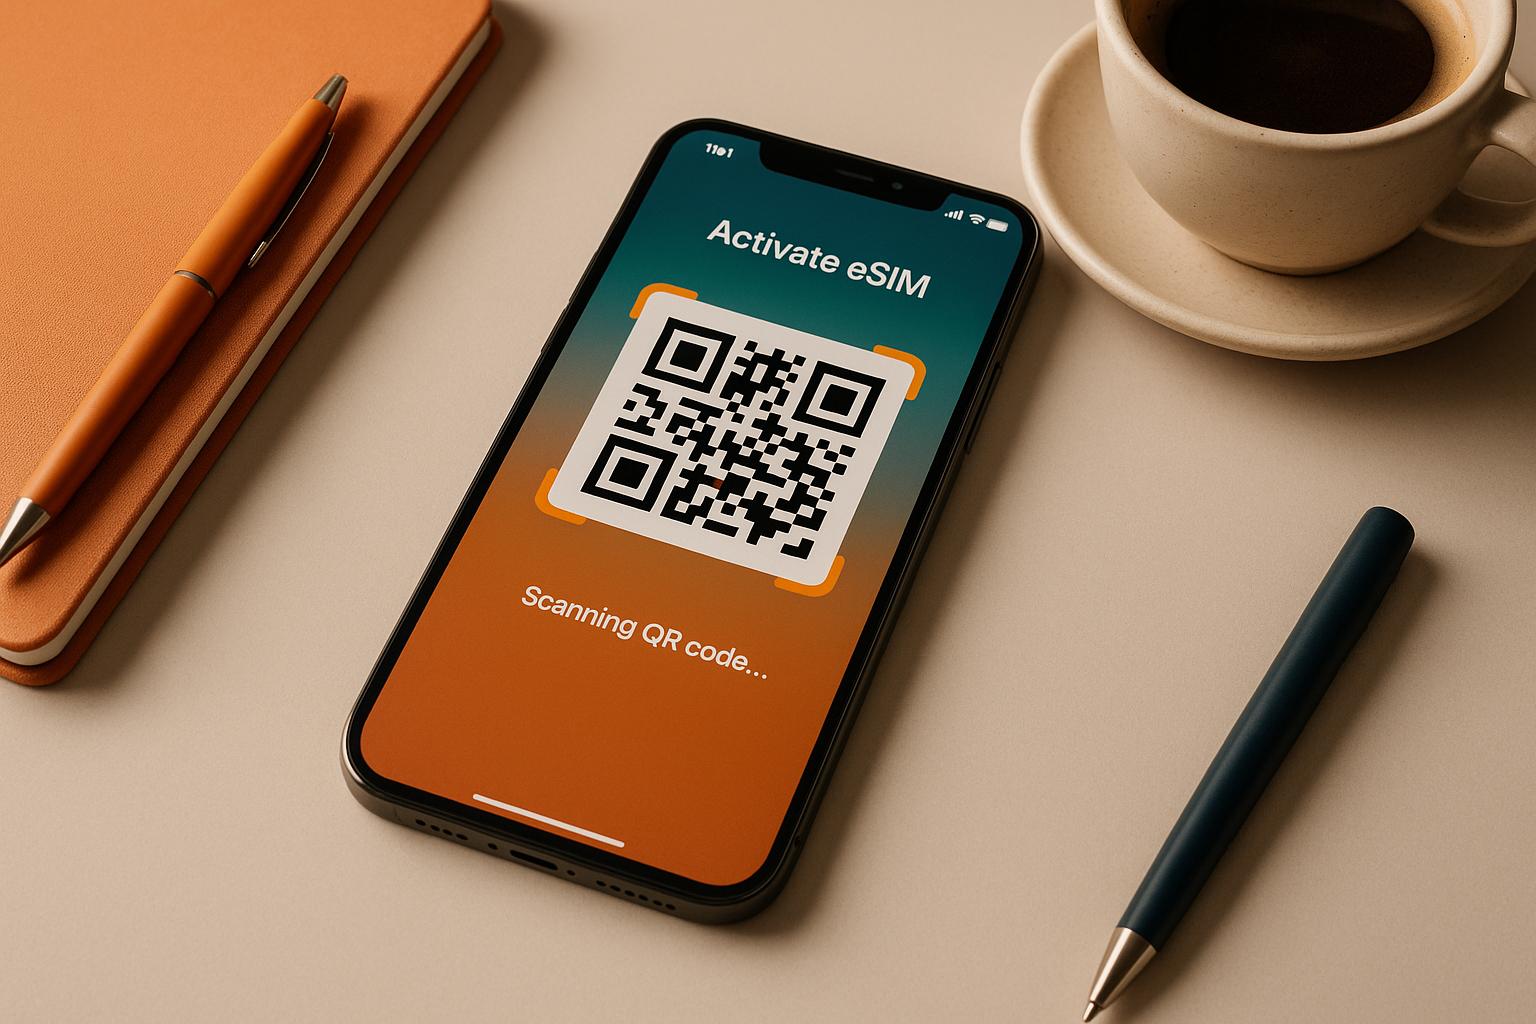
Activating an eSIM is quick and eliminates the need for physical SIM cards. Whether you’re using an iPhone or Android, here’s how to get started:
- Check Compatibility: Ensure your device supports eSIM. Look for an EID (32-character number) in your phone’s settings or dial
*#06#to confirm. - Request an eSIM Plan: Contact your carrier or use providers like ZIM Connections for affordable international plans starting at £2.
- Activate the eSIM:
- QR Code: Scan the carrier-provided QR code in your phone’s settings.
- Manual Entry: Input the SM-DP+ address and activation code if QR scanning isn’t possible.
- Carrier Apps: Use your carrier’s app for a streamlined process.
- Finalise Setup: Assign the eSIM for calls, texts, or data in your device settings and enable data roaming if required.
For iPhones, activation is under Settings > Cellular > Add eSIM. On Android, it’s typically in Settings > Connections > SIM Manager or similar. Troubleshoot issues by restarting your device, ensuring data roaming is on, or contacting your carrier.
eSIMs are perfect for travellers and those managing multiple numbers. They let you switch plans easily and avoid roaming fees. Set up your eSIM before travelling to stay connected seamlessly.
How to set up eSIM on iPhone | Apple Support

Check if Your Device Supports eSIM
Before diving into eSIM activation or requesting a plan, it’s essential to confirm whether your device supports this technology. Not all phones are equipped for eSIM, so verifying compatibility upfront can save you time and effort.
Devices that support eSIM have a unique 32-character EID (Embedded Identity Document). Finding this EID is your first step to confirming compatibility.
Check eSIM Support on iPhone
Apple introduced eSIM support starting with the iPhone XS series, so most newer iPhones are eSIM-ready. To check, go to Settings > General > About, then scroll down to find the EID field. If you see a 32-character EID, your device supports eSIM. If the field is missing, your iPhone isn’t compatible.
As of November 2025, ZIM Connections lists the following iPhone models as eSIM-compatible:
- iPhone 16 Pro Max, 16 Pro, 16 Plus, and 16
- All iPhone 15 and 14 models
- iPhone SE (3rd generation)
- All iPhone 13, 12, and 11 models
- iPhone XS, XS Max, and XR
If you’re running iOS 16 or later, you might also have the option to transfer your eSIM wirelessly between iPhones using Apple’s Quick Start feature.
Check eSIM Support on Android
For Android users, the process is similar but varies slightly depending on the brand. You can usually check through the settings menu or by dialling *#06# to view your device’s identification numbers. Keep in mind, eSIM availability can differ based on your region or carrier, as some manufacturers produce different versions of the same model for different markets.
Here’s how to check on some popular Android brands:
- Samsung Galaxy: Go to Settings > Connections > SIM Manager. Look for an option like "Add Mobile Plan" or check for the EID.
- Google Pixel: Navigate to Settings > Network & Internet > SIMs and look for an "Add Carrier" option. If it’s available, your device supports eSIM.
- Other Android Brands: Try Settings > About Phone > Status Information to locate your EID. Alternatively, dial *#06#.
As of December 2025, ZIM Connections confirms eSIM compatibility for many Android devices, including:
- Samsung: Galaxy S25, S24, S23, S22, S21, S20 series, and Z Fold/Z Flip series
- Google Pixel: Pixel 9, 8, 7, 6, 5, 4, 3, and 2 series
- Motorola: Razr series, Edge series, Moto G series
- Xiaomi: Redmi Note and numbered series
- Sony Xperia, Oppo Find and Reno series, Huawei flagships, Honor Magic series, and more
If you’re unsure about your specific model, you can use the ZIM Connections compatibility checker at zimconnections.com to search for your device.
Once you’ve confirmed that your device supports eSIM and appears on a compatibility list, you’re ready to request a plan and begin the activation process. Double-checking this step can help you avoid delays when setting up your eSIM.
How to Get an eSIM Plan
Once you’ve confirmed that your device supports eSIM, you can skip the hassle of a physical SIM card. The process is entirely digital, starting with requesting an eSIM profile to activate your plan.
Request an eSIM Profile from Your Provider
Reach out to your carrier or service provider through their website, mobile app, or customer service channels to request an eSIM profile instead of a traditional SIM card.
If you’re planning to travel internationally, platforms like ZIM Connections make things even easier. They let you browse and purchase eSIM plans directly from their website, offering connectivity in over 200 destinations worldwide. Their plans cater to various needs, including local options for single countries, regional coverage (e.g., Europe, Asia, or the Middle East), and global plans spanning more than 125 countries. Prices are affordable, starting at £0.80 in Turkey, £1.60 in Spain, or £6 for global coverage.
The process is straightforward: choose your destination, pick a plan that fits your data and voice needs, and complete your purchase. Within minutes to a few hours, you’ll receive your activation details via email. Be sure to have your account information and 32-character EID handy, as this helps the carrier verify your eligibility and ensure the eSIM profile is properly set up on your device.
QR Codes and Activation Links
After purchasing your eSIM plan, your carrier will provide the activation details, usually via QR codes or activation links.
QR Codes
QR codes are the most common method for eSIM activation. These codes contain all the necessary details, such as the SM-DP+ (Subscription Manager Data Preparation) address and a unique activation code linked to your account. Simply scan the QR code with your device, and it will automatically download the carrier profile. The process is quick – usually completed in seconds – with no need to manually input technical data.
Activation Links
For devices running iOS 17.4 or later, activation links are a convenient alternative. Instead of scanning a QR code, you’ll receive a clickable link via email or text message. Tap the link on your device, and the eSIM activation process begins automatically – no need to open the camera app.
Carrier Apps
Some providers streamline the process even further by integrating eSIM activation directly into their mobile apps. Download the app from the App Store or Google Play Store, and follow the in-app instructions to request and activate your eSIM. This option is particularly handy if you’re juggling multiple lines or plans.
If you don’t receive your QR code or activation link within the expected timeframe, contact your carrier’s customer support. Make sure to have your account number and device EID ready to verify your identity and speed up the process.
Manual Activation
When QR code scanning or activation links aren’t an option, manual activation is another route. Your carrier will provide an SM-DP+ address and an activation code, which you can enter directly in your device settings. This method works on both iPhone and Android devices, though the steps may vary depending on the manufacturer.
No matter which method you choose, make sure you have a stable Wi-Fi or mobile data connection during activation. Your device needs internet access to download the carrier profile and complete the setup. Once the QR code is scanned, the link is tapped, or the details are entered manually, the activation usually happens almost instantly.
How to Activate eSIM on iPhone
Activating an eSIM on an iPhone with a supported iOS version is straightforward, thanks to remote provisioning. Your iPhone uses its built-in Local Profile Assistant to download and install the carrier profile after scanning a QR code. Each iPhone also comes with a unique Embedded Identity Document (EID), which helps the network identify your device during activation, securely linking the eSIM profile to your phone.
Activate eSIM Using a QR Code on iPhone
Scanning a QR code is the most common and quickest way to activate an eSIM. Here’s how to do it:
- Go to Settings > Cellular (or Mobile Data) and tap Add eSIM.
- Use your iPhone’s camera to scan the QR code provided by your carrier.
- When the "Cellular Plan Detected" notification pops up, tap it to proceed.
- If prompted, carefully enter a confirmation code from your carrier and tap Continue.
For iPhones running iOS 17.4 or later, there’s an even faster option. If you receive a QR code in your default email app or browser, simply tap and hold the QR code. A menu will appear with the option to Add eSIM. Tap it to start the activation process right away.
Once the QR code is scanned, your iPhone will download the carrier profile, prompt you to label the eSIM (e.g., "Work" or "Personal"), and let you set its default usage. After activation, make a quick call to ensure your connection is live. If you’re transitioning from a physical SIM to an eSIM, remove the physical SIM card and restart your phone to complete the switch.
For travellers using services like ZIM Connections, the process is just as simple. After purchasing a plan, you’ll receive a QR code via email, usually within minutes or a few hours. Before your trip, connect to Wi-Fi at home, scan the QR code, and your travel eSIM will be ready for use when you arrive at your destination.
If you don’t have access to a QR code, there are other ways to activate your eSIM.
Other Ways to Activate eSIM on iPhone
No QR code? No problem. Here are alternative methods to activate an eSIM on your iPhone:
- Activation Links: Your carrier might send a clickable link via email or text. On iPhones running iOS 17.4 or later, tapping the link will trigger an "Activate New eSIM" notification. Simply tap Allow to proceed.
- Carrier Apps: Download your carrier’s app and follow the eSIM activation steps within the app.
- Manual Entry: If you’re provided with an SM-DP+ address and Activation Code, you can enter these manually. Go to Settings > Cellular > Add Cellular Plan, tap Enter Details Manually, and input the information exactly as given.
- eSIM Carrier Activation: If you purchased your iPhone directly from a carrier and shared your plan details at the time of purchase, the eSIM may activate automatically during the initial setup. Simply follow the on-screen prompts.
- iPhone-to-iPhone Transfers: If you’re upgrading to a new iPhone running iOS 16 or later, Apple’s Quick Start feature allows you to wirelessly transfer your eSIM. Place your old iPhone near the new one during setup and follow the prompts. If the wireless transfer doesn’t work or you prefer starting fresh, deactivate the eSIM on your old device and request a new QR code from your carrier.
Once your eSIM is activated, double-check by heading to Settings > Cellular to ensure the new eSIM appears under your cellular plans.
sbb-itb-273ea09
How to Activate eSIM on Android
Activating an eSIM on an Android device works similarly to the process on iPhones, though the exact steps can vary depending on the manufacturer. Brands like Samsung and Google Pixel customise the Android operating system with their own user interfaces, which means the settings menus may look different. However, all Android phones rely on the same underlying technology – a built-in Local Profile Assistant (LPA) that downloads and installs carrier profiles once activation begins.
Before starting, make sure your device supports eSIM functionality. The easiest way to check is by opening the dialler app and typing *#06#. If an EID number appears alongside your IMEI, your device can use eSIM. Alternatively, go to Settings > About Phone > Status Information and look for an EID entry.
Activate eSIM Using a QR Code on Android
Using a QR code is the simplest way to activate an eSIM on Android. While the exact steps depend on your device, the general process is similar across brands.
- For Samsung Galaxy devices: Open Settings, then tap Connections. Next, go to SIM Manager to see your current SIM profiles. Tap Add eSIM (or the plus icon), then choose Scan QR code from the available options. Use your camera to scan the QR code provided by your carrier.
- For Google Pixel phones: Navigate to Settings > Network & Internet, then tap SIMs. Select the plus icon to add a SIM, which will take you to a screen labelled "Connect to mobile network." Choose Download a SIM instead? instead of inserting a physical SIM. Tap Next, then scan the QR code from your carrier.
- For other Android devices: The steps are generally similar. Go to Settings > Network & Internet (or Connections) > SIMs or Mobile Network. Look for an option to add a new SIM or mobile plan.
Once the QR code is scanned, the LPA downloads and installs the carrier profile automatically. The process is quick, and your device should connect to the network as soon as the installation is complete. Some devices may suggest a restart, but this isn’t always required.
For travellers using providers like ZIM Connections, you can set up your travel eSIM before leaving. Simply connect to Wi-Fi at home, scan the QR code sent via email, and the eSIM will be ready to use upon arrival. To activate it, enable the eSIM in your settings and turn on data roaming.
If scanning a QR code isn’t an option, you can use the manual activation method.
Activate eSIM Manually on Android
If you can’t scan a QR code, you can manually activate your eSIM. This requires two key pieces of information from your carrier: an SM-DP+ Address (a server address) and an Activation Code (a unique combination of letters and numbers).
Once you’re on the Add eSIM screen in your device’s settings, look for an option like Enter activation code or Enter it manually. Selecting this will bring up fields where you can input the SM-DP+ Address and Activation Code.
Make sure to enter the details exactly as provided by your carrier – any mistakes, even a single character, can prevent activation. After double-checking, tap Continue or Activate to securely download and install the eSIM profile.
This manual method is especially helpful if your activation details were shared via email or SMS rather than a QR code. It’s also a great alternative for users who may have accessibility needs or technical limitations that make scanning a QR code difficult.
Post-Activation Steps
After activating your eSIM – whether through a QR code or manual entry – confirm that it appears in your device’s SIM settings. To ensure smooth connectivity, check a few additional settings:
- APN Settings: If your carrier provided specific APN details, make sure they’re correctly configured to avoid issues with data connectivity.
- Data Roaming: Turn this feature on or off depending on your travel or usage needs.
- Network Selection: Decide whether to use automatic or manual network selection.
- eSIM Profile Management: If you’re managing multiple eSIM profiles, designate which one to use for calls, messages, and mobile data.
Configure Settings and Fix Common Problems
After activating your eSIM, it’s important to fine-tune your settings to ensure smooth performance. Even if activation goes off without a hitch, connectivity issues can arise if certain options aren’t properly configured. Below, we’ll guide you through the key network settings and solutions to common problems users often face.
Set Up Network Settings After Activation
Once your eSIM is activated, assign it as the primary line for calls, texts, and data in your device settings. For iPhone users, head to Settings > Cellular to review your cellular plans. Select your eSIM and set it as the default line for voice calls and data. If you’re using dual SIM functionality, you can configure it as a secondary line instead.
For Android devices, the process depends on the manufacturer. Samsung users should go to Settings > Connections > SIM Manager to set their preferred SIM for calls, data, and messages. On Google Pixel, these options are located under Settings > Network & Internet > Mobile Network. Be sure to set your preferred SIM for mobile data and enable data roaming, particularly for international plans.
If you’re using an international eSIM provider like ZIM Connections, which works in over 200 destinations, enabling data roaming is crucial. Without it, your device won’t connect to local networks when abroad, even if the eSIM profile is active. On iPhone, toggle on Data Roaming under Settings > Cellular > Cellular Data Options. On Samsung, navigate to Settings > Connections > Mobile Networks and enable Roaming. Other Android devices typically have this option under Settings > Network & Internet > Mobile Network.
Another key step is checking your network selection settings. Most devices automatically connect to the strongest network, but if you notice poor connectivity, manually select your carrier instead. This option is available in the mobile network settings on both iPhone and Android.
Lastly, verify your APN (Access Point Name) settings. Most carriers handle this automatically during activation, but if data issues persist, you may need to enter these settings manually. On iPhone, find APN settings under Settings > Cellular > Cellular Data Network. For Android, Samsung users can check Settings > Connections > Mobile Networks > Access Point Names, while Google Pixel users should look under Settings > Network & Internet > Mobile Network > Advanced > Access Point Names.
By completing these steps, you’ll ensure your eSIM is ready to perform as expected.
Fix Common eSIM Problems
Even after configuring your settings, you might run into some common issues. One frequent problem is no signal after activation. If your eSIM is active but you can’t make calls or access mobile data, confirm it’s set as the primary line. On iPhone, check Settings > Cellular > Cellular Plans, and on Android, review your SIM management settings.
If the eSIM is correctly configured but there’s still no signal, restart your device and ensure data roaming is enabled if you’re on an international plan. If the issue persists, manually select your carrier’s network in the settings instead of relying on automatic selection.
Another common issue is QR code scanning failure. If your camera struggles to read the QR code, make sure you’re in a well-lit environment and hold your device steady. Position the QR code correctly within the camera frame, avoiding glare or shadows. If scanning still doesn’t work, opt for manual entry. On iPhone, select "Enter details manually" after choosing Add Cellular Plan. On Android, choose "Enter activation code" instead of scanning. You’ll need the SM-DP+ Address and Activation Code from your carrier, so double-check these details when entering them.
Some users may face confirmation code problems during activation. Certain carriers use interactive SMS (iSMS) confirmation, requiring you to respond to a text message to finalise activation. If you don’t receive the code promptly, reach out to your carrier’s support team for assistance.
If manual entry fails or you encounter an error message during activation, your carrier might need to issue a replacement QR code or verify the provisioning status of your eSIM profile. Contact their support team through their website, app, or phone line, and provide details like your device model, operating system version, and the specific error message. Make sure to mention the troubleshooting steps you’ve already tried.
For users who can’t make calls despite having a signal, the issue likely lies in connectivity settings. Check that your eSIM is set as the primary line for calls in your device settings. Test by making a call to confirm everything is working. If calls still fail, this might indicate an issue on your carrier’s end, so contact their support team for further help.
If you’re transferring an eSIM to a new device, deactivate it on the old device first. On iPhone, go to Settings > Cellular > Cellular Plans and tap the red minus button next to the eSIM plan. On Android, follow your device-specific instructions to deactivate the eSIM. Once deactivated, request a new QR code or transfer code from your carrier. After receiving it, follow the standard activation steps on your new device and configure the same network settings.
For international travel, some eSIM providers recommend installing the eSIM the day before your trip and activating it by selecting it for mobile data once you arrive. This ensures everything is set up correctly before you need connectivity abroad.
How to Manage Multiple eSIM Profiles
Managing eSIM profiles effectively can make travelling and handling multiple lines much easier. Modern smartphones allow you to store several eSIM profiles, letting you switch between work, personal, and travel numbers without juggling multiple devices. While most iPhones and Android phones support multiple eSIM profiles, only one can be active for mobile data at a time. This feature is particularly handy for business users who want to keep work and personal communications separate, as well as for frequent travellers looking to avoid high roaming fees.
Adding a new eSIM profile is straightforward. Use the same QR code or activation link process you used initially. Once added, each profile is stored separately, and your device will prompt you to label it for easy identification. Clear labels like "Work" or "Travel" can help you avoid confusion. Below, we’ll explore how to add, deactivate, and switch between profiles efficiently.
To deactivate an eSIM on an iPhone, go to Settings > Cellular, select the profile, and choose Turn Off This Line or Remove eSIM. This preserves the profile for future use. On Samsung devices, head to Settings > Connections > SIM Manager, select the profile, and tap Remove or Delete. For Google Pixel, navigate to Settings > Network & Internet > SIMs, select the profile, and choose the delete option. If you want to delete a profile permanently, contacting your carrier is often the best approach.
Once a profile is deactivated, switching to a different one is quick and easy.
Switch Between eSIM Profiles
Switching profiles on an iPhone is simple. Go to Settings > Cellular, view your active profiles, and select the one you want to enable. You can also assign specific lines for calls, messages, and mobile data. With iOS 16 or later, you can manage profiles directly from the Control Centre by swiping down and long-pressing the Cellular icon.
For Android users, the steps vary by device. On Samsung Galaxy phones, go to Settings > Connections > SIM Manager to choose a profile. Google Pixel users can switch profiles under Settings > Network & Internet > Mobile Network. After switching, it’s a good idea to test connectivity by making a call or sending a message.
For business users, separating work and personal eSIM profiles can help maintain a better work–life balance. For example, you could activate your work profile during office hours and switch to your personal profile afterward. This separation also simplifies expense tracking, as work-related data usage remains distinct from personal usage.
Frequent travellers benefit from this flexibility as well. A UK-based business traveller visiting France, for instance, can keep their UK number active for calls and texts while activating a French eSIM profile for affordable local data. This eliminates the need for multiple devices or swapping physical SIM cards, while also avoiding high roaming charges.
Planning ahead is key for international travel. Purchase a travel eSIM plan from a provider like ZIM Connections, which offers coverage in over 200 destinations. Install the travel profile via Wi-Fi at home before your trip, so it’s ready to activate upon arrival. Keep your primary eSIM active for calls and texts, and switch to the travel profile for data. For extended stays, consider regional or local plans for better performance and value.
Security Tips for Managing Multiple Profiles
While having multiple eSIM profiles is convenient, it’s important to stay vigilant about security. Each profile is protected by your device’s security features and your carrier’s authentication systems, but more profiles can mean a larger potential attack surface. To minimise risks, ensure your operating system and security software are up to date, use strong authentication methods like PINs or biometrics, and regularly review which profiles are active. Additionally, use the appropriate profile for sensitive transactions to maintain privacy and compliance.
Conclusion
The steps and advantages discussed earlier show how straightforward eSIM activation can be. Whether you’re using an iPhone or Android, the process takes just minutes to complete.
Switching to eSIM technology comes with plenty of perks, especially for frequent travellers and professionals. With the ability to store multiple eSIM profiles on one device, you can easily switch between work and personal numbers without the hassle of handling physical SIM cards. For international travellers, eSIMs eliminate the need to hunt for local SIM cards at airports or pay steep roaming fees. Providers like ZIM Connections offer coverage in over 200 destinations, with plans starting from just £2, making it an affordable choice for staying connected on the go.
Before heading off on your next trip, think about setting up a travel eSIM plan at home over Wi-Fi. This ensures it’s ready to activate as soon as you land. You can keep your main eSIM active for calls and texts while using a travel profile for data. Labelling profiles like "Personal", "Business", or "Travel" makes managing multiple eSIMs effortless.
As previously mentioned, handling multiple profiles and troubleshooting common issues is simple, adding to the convenience of eSIMs. This technology is paving the way for a more flexible and user-friendly mobile experience. Explore international eSIM plans with ZIM Connections and see how it can meet your connectivity needs – whether you’re at home or travelling abroad. The ease and versatility of eSIMs ensure you’re always connected, no matter where life takes you.
FAQs
How can I check if my Android phone supports eSIM technology?
To determine if your Android phone supports eSIM, start by reviewing the device specifications on the manufacturer’s website or checking your user manual. Many recent Android models, particularly flagship devices, are equipped with eSIM functionality.
Another way to check is through your phone’s settings. Navigate to Settings > Connections > SIM card manager (or a similar menu, depending on your device). If you spot options like eSIM or Add mobile plan, it’s a good indication that your device supports eSIM. Still unsure? Reach out to your mobile provider for confirmation.
What can I do if I haven’t received the QR code or activation link for my eSIM?
If you’re waiting for your eSIM QR code or activation link and it hasn’t arrived yet, start by checking your email inbox. Don’t forget to look in your spam or junk folder – it might have landed there by mistake.
Still can’t find it? Get in touch with the provider or platform where you bought the eSIM. For instance, ZIM Connections offers dependable customer support to help sort out these issues promptly. Their international eSIM plans are tailored to keep you connected smoothly, no matter where your travels take you.
Can I use multiple eSIM profiles on my phone, and how can I manage them efficiently?
Yes, most modern smartphones let you store and use multiple eSIM profiles, making it convenient to switch between them for personal, business, or travel needs. While you can save several eSIMs on your device, keep in mind that most phones allow only one eSIM to be active at a time, depending on the device’s specifications.
To manage your eSIM profiles, head to your phone’s settings. If you’re using an iPhone, go to Settings > Mobile Data > Mobile Data Plans. Here, you can select, rename, or delete profiles. For Android users, navigate to Settings > Network & Internet > SIMs (or a similar option, depending on your phone’s brand). This menu lets you activate an eSIM, adjust settings, or remove profiles. Make sure you choose the correct eSIM profile to avoid unexpected charges or connectivity issues.